Leather Obi Belt

Materials needed: 1/4 yard of leather or pleather, 1/8 yard of coordinating silk or rayon, thread and machine, some silly posing skillzz

Step 1: PATTERN. Grab some newspaper and cut it to the length you want your belt, plus a half inch. My pattern measured about 24 inches. Then, fold the paper into fourths, and cut it into the shape you want. (Having it folded will ensure that the belt is symmetrical). I wanted mine to be like a long oval, so I cut it the way you see in the picture, but you could also do it in a rectangle, or other shape.

Open it up and hold it up on your body to make sure you like it. It's ok if it's a bit big because you will lose half an inch for the seams. YYEaaah your pattern is DONE 🙂

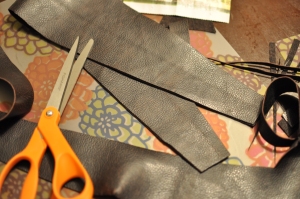
Step two: LEATHER FACE. Fold your pattern in half, fold your leather in half, and lay them on top of one another with the folded edges lined up with one another. Carefully cut the leather around your paper pattern.

...you've got two symmetrical leather pieces (for the front and back). Cool the leather cutting is DONE! 🙂

Step three: TIES. Take that 1/8 yard of silk or whatever you got and cut it in half, length-wise. (This pic is really misleading. It shouldn't look as skinny as this -__- sorryy)

Take one piece and fold it in half, length wise again, so it's a long strip. Sew down the raw long edge...

...like so. This will give us pretty points at the ends of our bow 🙂 Backtack right there (backtack means to sew backwards a few stitches, then forward again to secure the thread from coming loose), and repeat for the other strip

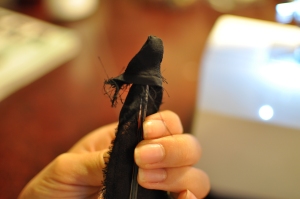
Grab a pen or knitting needle or some similarly long rod like object, and flip those strips inside out...

Step four: PUTTING IT ALL TOGETHER. ooohhh k! So, make a sandwich - leather (right side facing in), two ties (with raw edge sticking out, one on each side), and leather (right side facing in). I know, it's a crazy inside out sandwich, but just trust me on this!

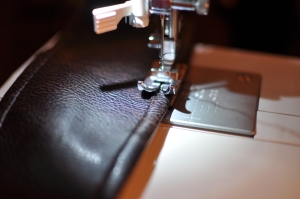
...and keep sewing around - sew down the long edge (being VERY CAREFUL not to sew any other part of the ties down!!!), sew down the other tie, and sew back around the other long edge (keep those ties out of the way!), BUT leave an opening, about the length of your hand. Backtack!

Any way, stick your hand in that opening and grab the two ties, and pull them out carefully. Gently coax out the rest of belt until it is flipped inside out. Yes, it will feel like this brown thing is literally giving birth, but it will turn into...

...this almost-belt-crab-looking-thing! Hand stitch the opening closed using an invisible stitch (youtube this).

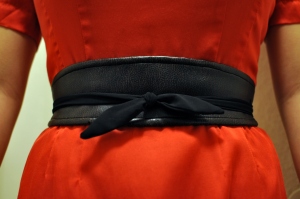
Lay the leather on your waist, wrap the ties around your back, pull them back to the front and tie a knot...


I love obi belts and recently made a leather one, too. You did a great job with yours, it looks wonderful!
Thank you Catherine! 🙂